So, you bought a FDM machine (or are in the market for one), and now you want to know how to use it? Look no further, this is your basics guide to FDM printing. More info on different printers here and here. This is “How to get started with 3D printing – using an FDM printer”.
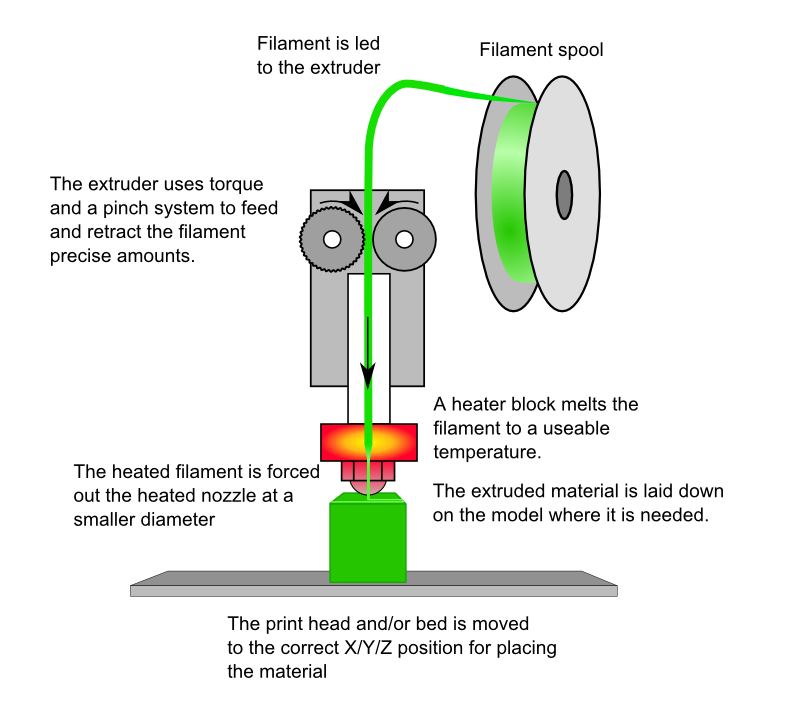
FDM stands for Fused Deposit Modelling, FFF stands for Fused Filament Fabrication. These are 2 names for the same type of printer. This printer heats up a solid filament to a precise temperature, and squeezes it through a calibrated hole, to create strands of plastic. Layer by layer, this plastic is built up to create a model.
https://www.thingiverse.com/thing:29432
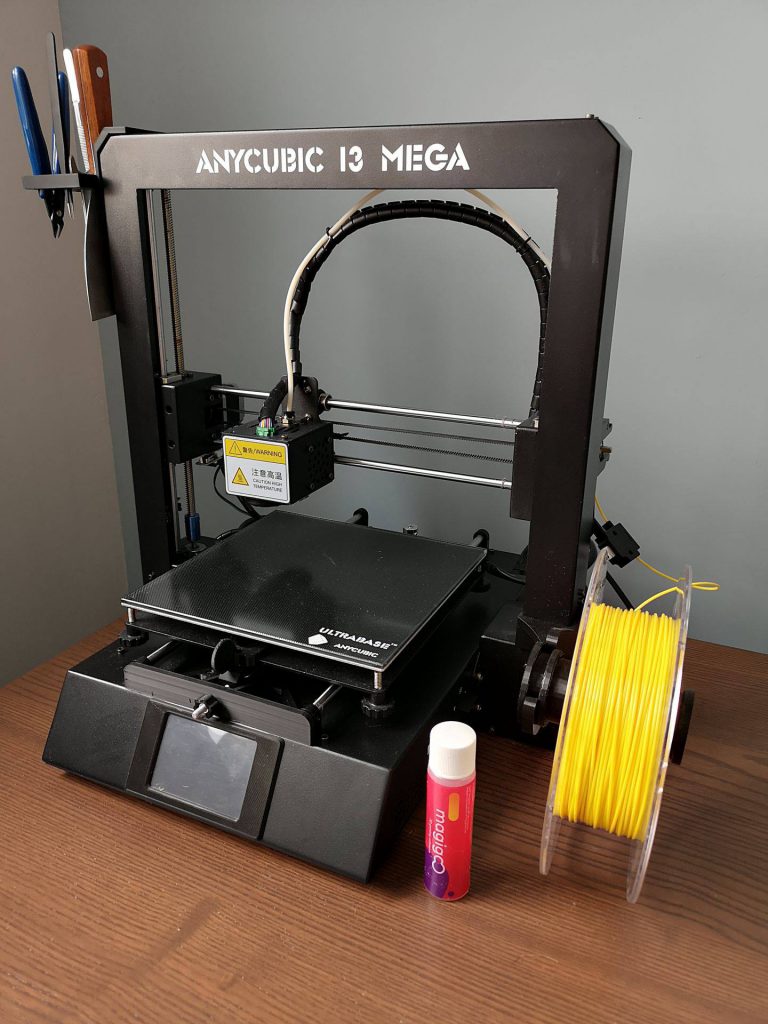
The printer I will use for this tutorial is my own Anycubic i3 Mega Ultrabase. This is a Cartesian FDM printer with the following features:
- Heated glass bed
- Manual levelling
- Bowden extruder
The heated bed helps with adhesion for some plastics, and is crucial for others. I mainly use my printer for PLA+ (poly lactic acid) and this is a good place to start. PLA+ has decent mechanical properties, but isn’t very heat resistant.
I level my printer manually, levelling makes sure the offset from th print head is the right distance, and makes sure the movement of the head, and bed are parallel, ensuring good prints. There are printers that have an auto levelling feature. Auto levelling modifies the movement of the print head to compensate for an unlevel bed. This is a very good feature, but nothing replaces a level print bed.
My printer uses a Bowden extruder, this means that the extruder drive motor is not located on the print head. This makes the print head lighter, but it also creates some issues. The filament will be under compression forces between the nozzle and the extruder, in a Bowden setup, this distance is up to 800mm. Some printers (like the Prusa i3) use a direct drive extruder, in which the compression of the filament is only ~10mm. Bowden extruders are generally not suited for the use of flexible filament.
Levelling
To level the bed of your printer, you will first need to home all the axis. This moves each axis, (X, Y and Z) to a home position and calibrates it. Some printers use end switches, others measure motor current to determine the home position. My specific printer has a home function on the touchscreen GUI that’s built into the printer. After homing I have to tell the printer to turn of the motors, so I can move the print head and bed by hand.
Now the print head is at the right height, I can move the bed and head so the print head lines up with each of the 4 corners of my print bed. Each corner has a set screw which moves that corner up and down.
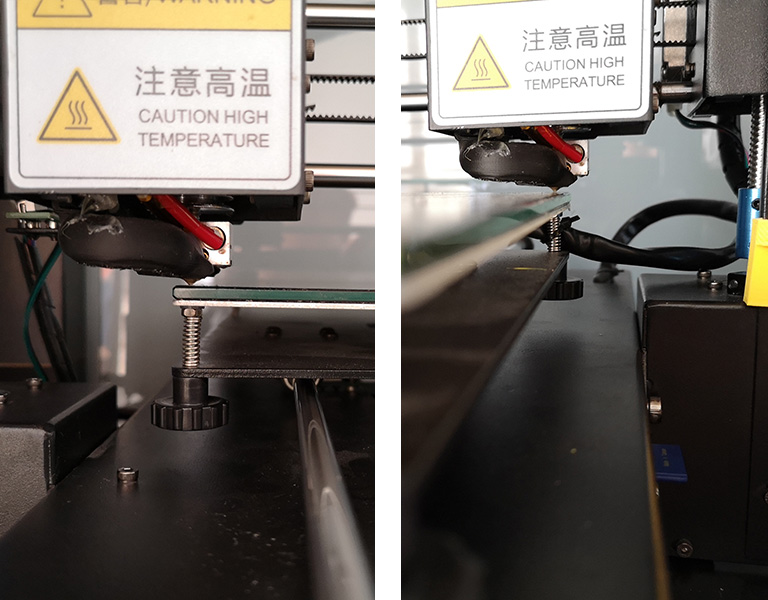
You will need to move the print head to each of the 4 corners, place a piece of paper in between the print head and the bed, and move the set screw until you feel a light resistance when trying to pull the paper out. This will equate to a ~0,2mm offset to the bed, which is what most printers will need to print properly.
Loading filament
Now that the bed is level, your printer will be ready to print. You will need to load the filament. Sidenote: there are 2 common diameters for filament, 1,75mm and 2,85mm. Be sure to have the right diameter filament for your printer.
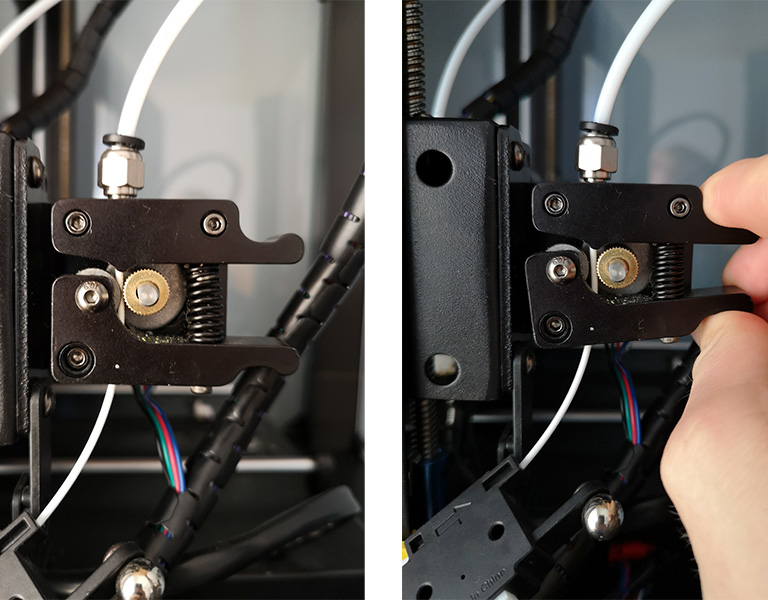
To load the filament, you will have to release tension on the spring on your extruder, to push filament in. When loading filament, make sure to push the filament in all the way to the nozzle, so through the bowden tube, print head, all the way to the end.
Priming and first print
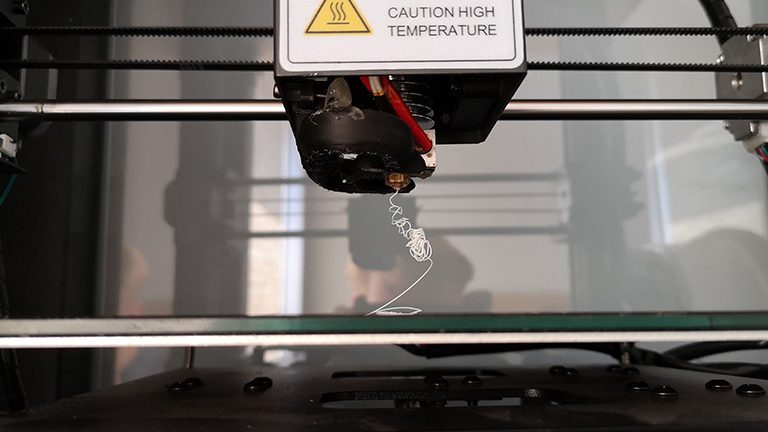
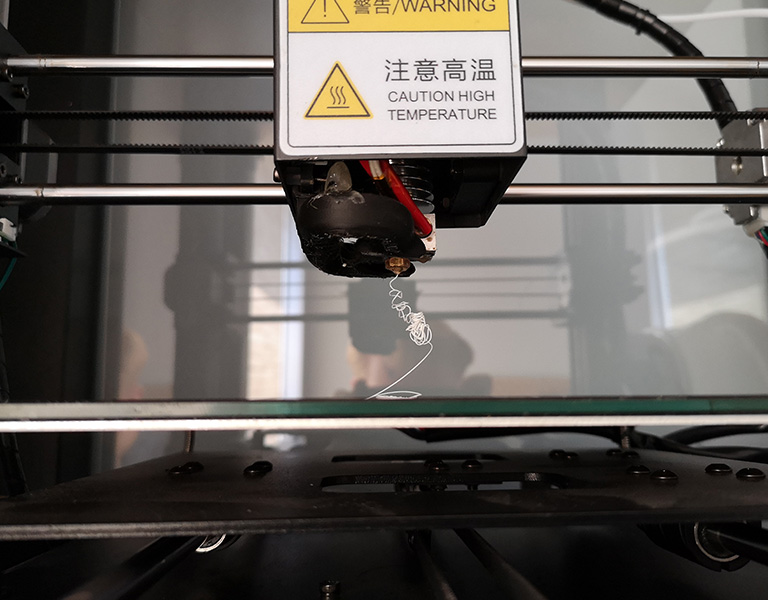
Your bed is level, your filament is loaded, all we need to do is prime the head. The filament we inserted isn’t in all the way. We need to heat up the print head, and push the filament in further. Some printers have a priming function, but I always do it by hand.
Start with heating up your print head to printing temperature (for PLA+ around 200°C), release the tension on the extruder, and push the filament by hand until it comes out of your nozzle. It should look like the image below.
Most printers out there will come loaded with a standard model that’s loaded on the SD card. You are now ready to print that model. Simply insert the SD card, press print, and the printer should do the rest.
If you want to print your own model, read the post on slicers.
Reach out in the comments with issues you have, or information I might have missed!


Hello there I am so thrilled I found your webpage,
I really found you by error, while I was looking
on Askjeeve for something else, Nonetheless I am
here now and would just like to say thanks a lot for a fantastic post and a all round enjoyable blog
(I also love the theme/design), I don’t have time to look
over it all at the minute but I have saved it and also
included your RSS feeds, so when I have time I will be
back to read a great deal more, Please do keep up the awesome work.